If you’re not a photographer, you might be wondering what a vignette is. In photography, a vignette is a editing technique that puts a border of light or darkness around the subject. It’s sole purpose is to draw your eye to the subject.
It might be personal preference but I adore a slight vignette. Very subtle with just a little darkness around the edges. I think a heavy vignette contradicts the purpose; it draws the eye to the outer edges.

Learn how to do a vignette (and see these images larger)
How to create a vignette:
Vignettes are the last step for pictures. Right before saving, I do this little trick to add a little pizazz. I use Photoshop CS3 so these steps might not work for everyone.
Layer>New Adjustment Layer>Levels

I do nothing to the levels and use it as is.
Change the blending mode to “multiply” and set opacity to 40% (multiply is going to keep the details in my picture, instead of adding a solid black paint layer. You can adjust opacity to taste)

I use the rectangular marquee tool, feather at 150 px, and drag from top left corner to bottom right corner. I then use the paint bucket tool set to black to mask out the middle of the image.

If my subject’s skin gets some of the vignette on it, I use a soft brush to mask it back. And that’s it! A very subtle vignette to draw the eyes toward the center of the picture.
And for you to see my son’s cuteness even better, larger images.
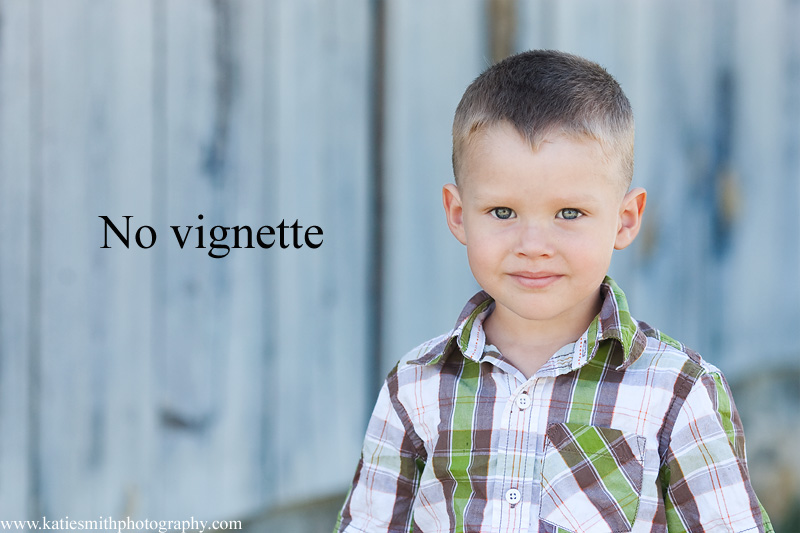
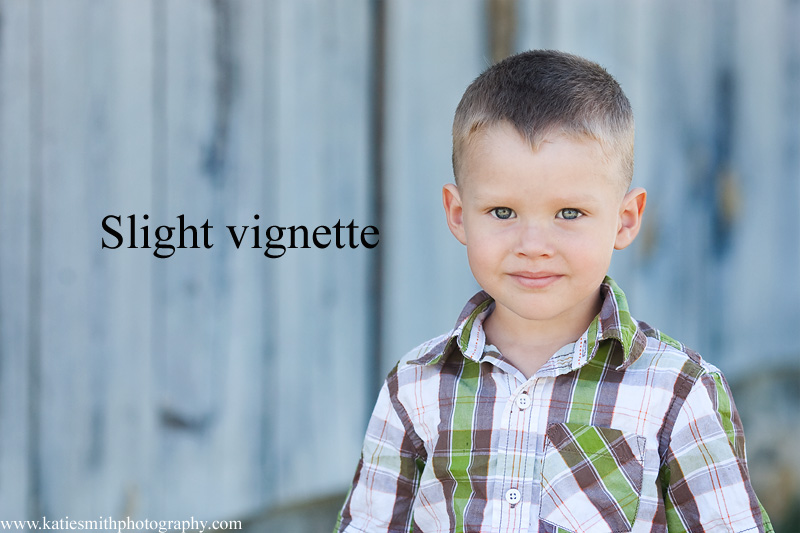
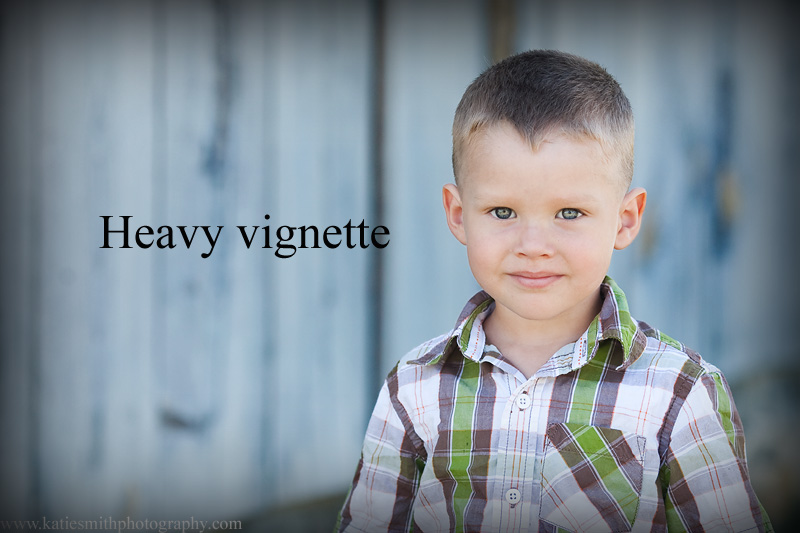
What kind of vignette do you prefer?
 Katie Smith is a family and couples photographer serving Central Texas from Lampasas to Temple.
She loves playing in photoshop and learning new techiques.
She also loves going location scouting and taking pictures of new locations with her iPhone.
Want some of the latest news? Find me on Facebook!
Want all the latest news? Joining my once a month newsletter mailing list!


Tina Beckett
2 Aug 2012I’m a fan of soft vignette too. And your son is so cute! I seriously want to steal him 🙂